Google Analytics is a web analytics service that offers statistics and basic analytical tools for search engine optimization (SEO) and marketing. The service is part of the Google Marketing Platform and is free for all Google account holders.
Google Analytics is used for tracking website performance and gain visitor insights. It can help organizations in determining the top sources of user traffic, assessing the success of their marketing activities and campaigns, tracking goal completions (such as purchases and adding products to carts), identifying patterns and trends in user engagement, and obtaining additional visitor information such as demographics. Small and medium-sized retail websites frequently use this to obtain and analyze various customer behavior analytics, which can be used to improve marketing campaigns, drive website traffic and better retain visitors.
In simple words, it is an essential tool for any website owner. It provides insights into how people are using your site, so you can make informed decisions about how to improve it. In this blog post, we’ll walk you through the steps on how to set up Google Analytics.
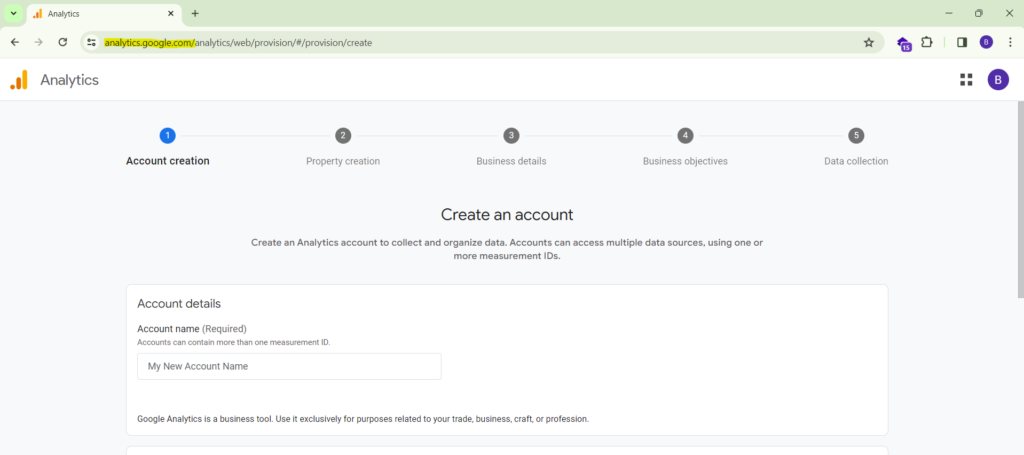
Step 1: Create a Google Analytics account
If you don’t already have a Google Analytics account, you’ll need to create one. To do this, go to the Google Analytics website (analytics.google.com) and click on the “Create account” button.
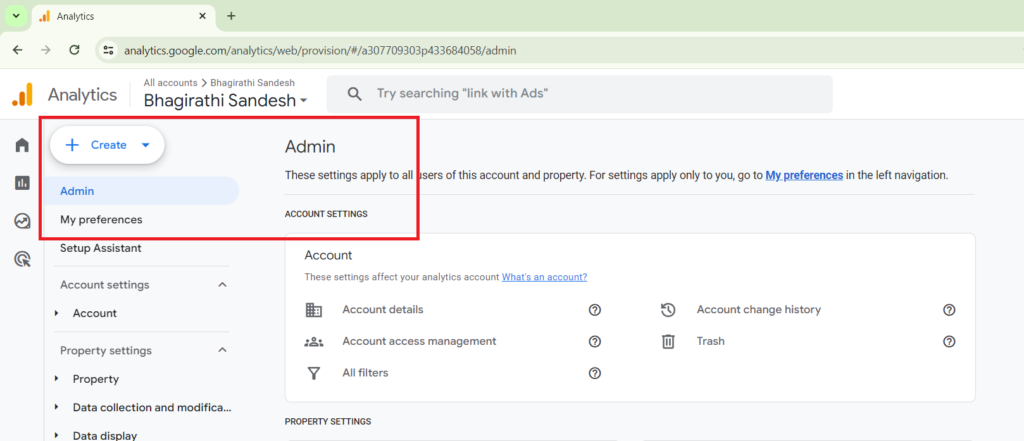
Step 2: Add your website to Google Analytics
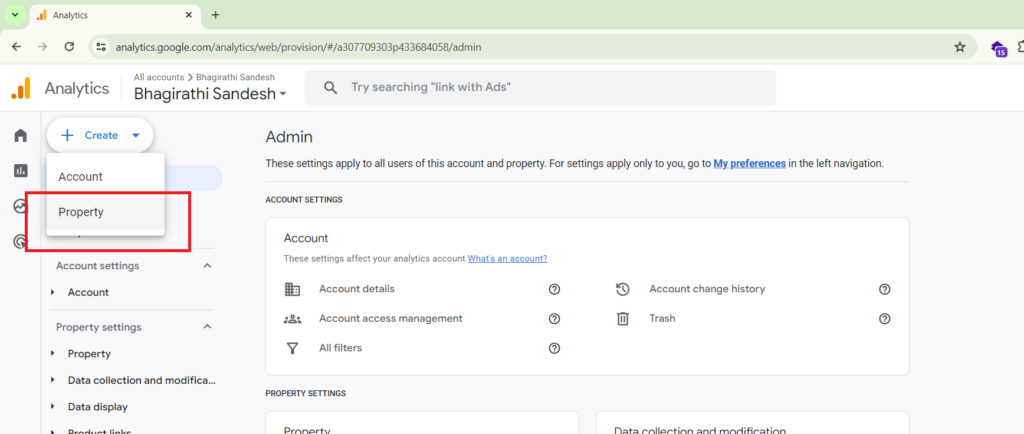
Once you have a Google Analytics account, you’ll need to add your website to it. To do this, click on the “Admin” tab.
and then click on the “Create new property” button.
Step 3: Copy your tracking code and paste it into your website
Once you’ve created the new property, you’ll see a tracking code. This code needs to be pasted into the header of your website. You can do this manually or by using a plugin.
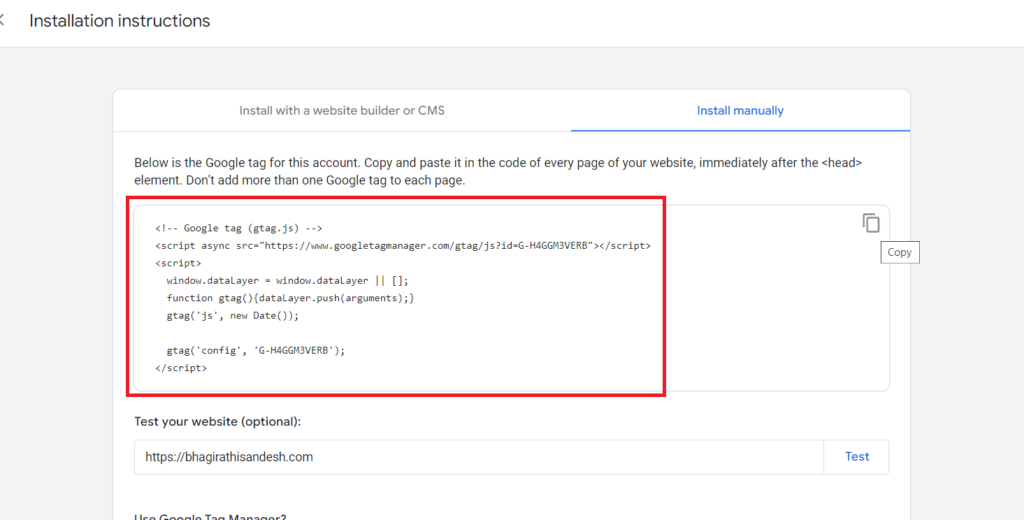
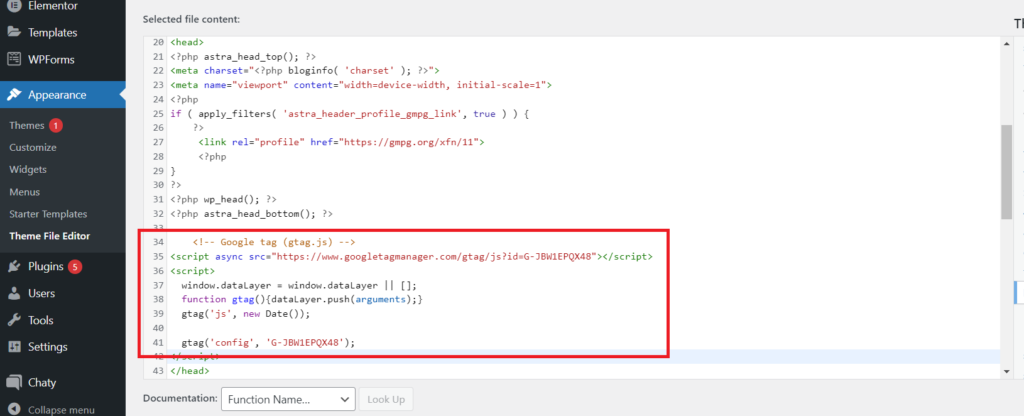
Now, go to your website and paste the code high in the <head> section of the page. Pasting the code high in the <head> section will help the tag fire properly and ensure you get the most accurate data.
Step 4: Verify that its working
Once you’ve pasted the tracking code into your website, you need to verify that it is working. To do this, go to the Google Analytics website and click on the “Real-Time” tab. If you see data coming in, then you know that it is working properly.
Step 5: Start using Google Analytics
Now that you’ve set up your account, you can start using it to track your website traffic. There are a number of reports that you can use to get insights into how people are using your site.